
Since the micro GC is dedicated exclusively to gas analysis, the presence of liquids or particles can cause severe damage to the apparatus. The most common protective device for micro GC is the membrane filter. This by-pass filter has a very low internal volume and requires a limited sample flow. It consists of a membrane to hold liquids and particles and a sinter for the finest particles.
How to guarantee the protection of the micro GC?
Because Micro GC systems are dedicated strictly to gas analysis, introducing liquids or solid particulates can cause severe instrument damage. The membrane filter serves as your analyzer's primary defense line. Featuring a ultra-low internal volume bypass design, it holds back liquids while a porous sinter captures fine particulates
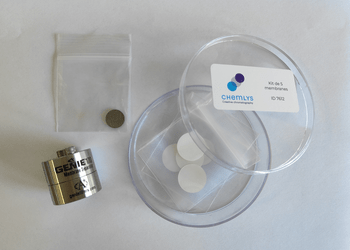
How Often Should You Maintain the Membrane Filter?
Maintenance frequency depends directly on sample matrix quality and analysis duty cycle.
First Check: Inspect the membrane 3 to 6 months after commissioning (if no liquid injection is suspected).Adjust Interval: If clean, extend the interval; if dirty, reduce it.Absolute Rule: Check and replace the membrane at least once a year.
Immediate Action: Whenever liquid contamination or particulate overload is suspected, inspect the filter immediately.
Step-by-Step Maintenance Guide
⚠️ Safety First: If your membrane filter is heated, turn off the heating zone and allow the assembly to cool down completely before handling.
Always work in a clean environment.
Required Tools & Parts:
- Replacement Membrane (Chemlys P/N: 7612)
- 5/16″ Open-end wrench
- 1/4″ Open-end wrench
- 9/64″ Allen key
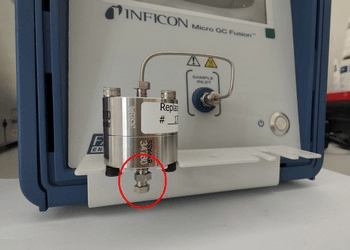
1. Disconnect Tubing: Use the 1/4″ wrench to remove sample lines connected to the filter.
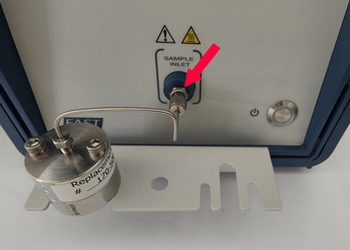
2. Unmount Filter: Use the 5/16″ wrench to disconnect the filter assembly from the Micro GC inlet.
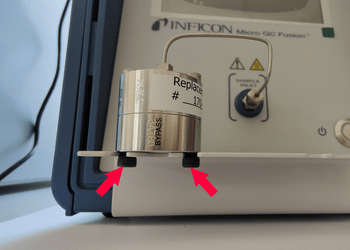
3. Remove from Support: Unscrew the bottom mounting screws using the 9/64″ Allen key.
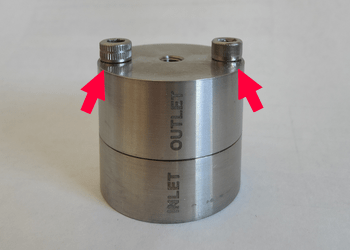
4. Open Enclosure: Remove the top housing screws with the Allen key to expose the membrane.
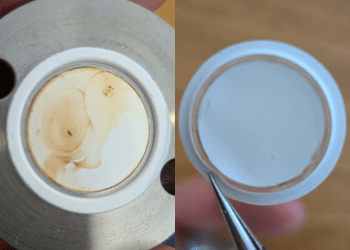
5. Inspect Membrane Condition:
– Clean on both sides: System is clean.
– Dirty on inlet side only: Filter successfully trapped contaminants.
– Dirty on both sides: Contamination breached the barrier; potential risk to the Micro GC.
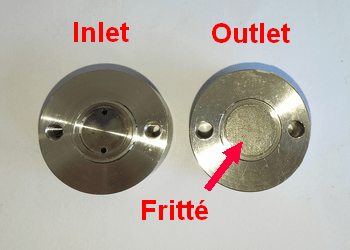
6. Clean Components: If residue is present on internal filter surfaces, clean housing parts with isopropanol and dry completely.
Replace the frit (P/N: 6912) or tubing if traces of pollution remain.
If the tubes show traces of pollution, replace them.
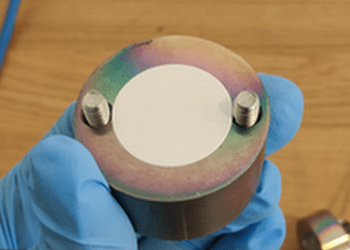
7. Insert New Membrane: Verify the frit is properly seated on the outlet side. Center a new membrane (P/N: 7612) over the housing.
Note: Never reuse an opened membrane, even if it appears clean, as sealing integrity will be compromised.
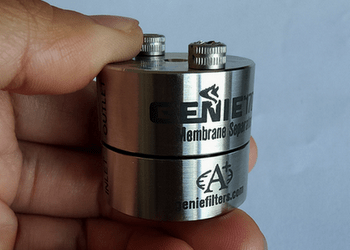
8. Reassemble Housing: Align the inlet cover over the centered membrane and tighten screws evenly to ensure a gas-tight seal.
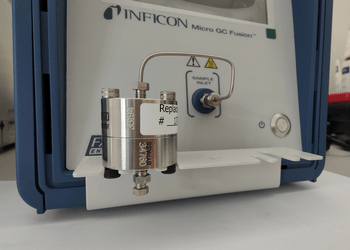
9. Remount & Reconnect: Reattach the assembly to its bracket, reconnect to the Micro GC inlet, and restore sample line connections.
How can I ensure that my membrane filter has been reassembled and does not leak?
Once the membrane filter is maintained, it is strongly recommended to check that the installation does not leak. Indeed, a leaking defect can cause:
- air (O2 and N2) on your analyses, although your samples do not contain any
- underquantification of interest compounds
- diffusion of the sample into the laboratory (point of vigilance especially in the case of analyses of toxic compounds)
To check this, we recommend using an electronic leak detector. The use of liquid (snoop, millet, etc.) is to prohibit the risk of polluting your tubes and therefore your micro GC !
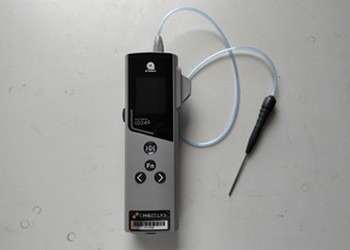
The steps to follow are as follows:
- Seal one of the two entrances of the membrane filter with a valco stopper.
- Connect a pressure gas to the second inlet. For this test, it is advisable to use helium with a pressure of 1 barg. As a reminder, the maximum inlet pressure of the micro GC is 2 barg. Beyond that, there is a high risk of damaging your modules' injection systems!
- Pass the electron leak detector probe across all critical areas (membrane filter nuts, micro GC inlet nut, around between the two parts of the membrane filter). If necessary, tighten the screws and/or nuts.
Related article for connection and purging of a carrier gas regulator:
Due to multiple mountings/disassembly of the membrane filter, leaks may persist even after tightening the nuts. This can be caused by ferrules too crushed with tightening. Their replacement is then necessary.
What to Do If Liquid Entered the Micro GC?
If liquid has passed through the filter into the Micro GC, simply replacing the membrane is not enough. Trapped liquid inside internal manifolds or micro-columns will cause baseline drift, detector contamination, or severe hardware failure.Immediate Next Steps:- Stop current analytical runs immediately.- Power down sample flow.- Open a support ticket on the Chemlys Digital Portal to receive guided recovery instructions from our service engineers.